 |
| Photos: Trevor Andrusko/BimmerWorld |

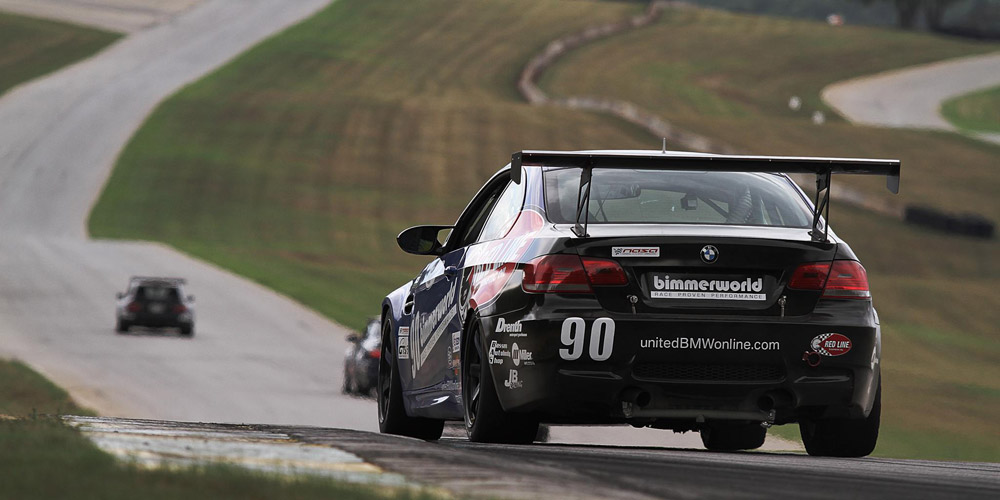
James is the principal behind the super successful BMW tuning company BimmerWorld as well as BimmerWorld Racing, currently fielding cars in Grand Am Street Tuner class.
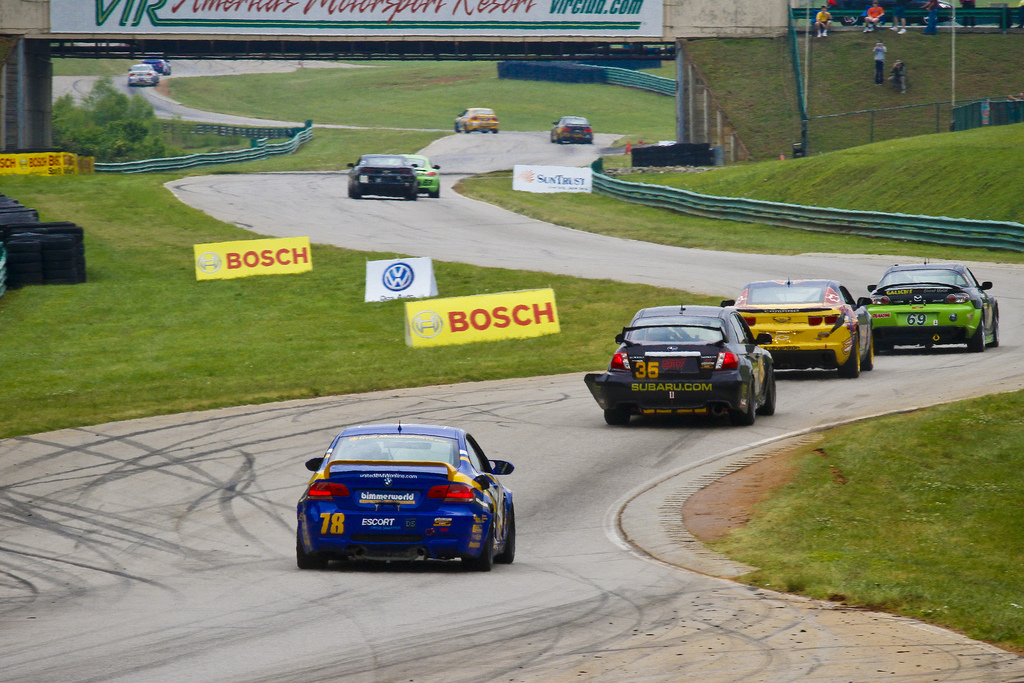
VIR is Bimmerworld's playground, it's where they test their race cars and all their go fast bits for BMW tracktards like us. James kindly shares his knowledge of this, one of the more epic tracks in North America.
Take your time, it's a lot of detailed information you'll find nowhere else that will be invaluable next time you are bombing the esses at triple digit speeds!
Take your time, it's a lot of detailed information you'll find nowhere else that will be invaluable next time you are bombing the esses at triple digit speeds!

Virginia International Raceway by James Clay.
Virginia International Raceway is technically my home track but it took me a while to consider it such.
I started driving in 1997, a few years before VIR reopened and even when it did, it took me a couple of years to set tire on this revived historic track.
I had become accustomed to the tracks I had learned on and never really saw the need to go there in my younger days. Once I did drive VIR however, I realized it was a special place and a treasure of a track.
Many years later, armed with experience from our BimmerWorld team and knowledge accrued at tracks throughout the US, North America and beyond, I understand much better the playground that is in my own backyard.
VIR withstands the test of time, unlike so many soulless country club tracks designed in the modern age, with little flow, maybe overly safe, VIR inspires you to drive.
It's a perfect combination of many types of circuits. It is a power track, it has lots of turns (17 in the traditional Full Course, which is my focus here, but the straights are long and many fast sweeping turns are taken on the gas. As a gauge, VIR Full takes as much fuel as any track we race on and has more time at full-throttle than most.
It is also a handling track, very fast sections are combined with several sections of quick turns flowing together perfectly, requiring inch-perfect placement with a car that transitions well.
VIR also demands pure guts, in a perfectly set up high-powered car with fresh tires, you can exit turn 4 flat and never lift until the quick brush of the brakes at the top of the uphill esses, just enough to enter the next-to-triple-digit, blind, diving left-hander called South Bend. This track really does have it all.
DRIVING CONCEPTS
VIR is a long track, but you can make it shorter.
Telemetry tells me I usually drive a couple hundred feet less per lap than drivers I coach who start off using traditional lines. Less distance traveled means higher average speeds and shorter lap times. VIR has a lot of elevation change, some dramatic and some, more subtle. We are accustomed to thinking in terms of responding to tracks turning left and right but significant consideration should be given to VIR's elevation changes and the grip added and lost because of them.
BY THE NUMBERS
Front Straight
There is a line on the straight, considering distance traveled. Apex the kink next to Start/Finish to cut distance - mid-track down the whole straight is a waste of precious distance.
The kink is not a "feature" until you approach it at 130-140 mph. It's at that point you realize it is not only a turn but that the track is falling and say, in a fast car without enough aero, you need to really pay attention as you approach this little bend.
T1-2
The braking zone is falling and if you are on the right side of the track, grip is reduced.
Massive brakes here, I like to brake a tick early into this turn, release and roll speed through it.
A faster line might be to brake deeper and then cut back hard, but I find this less repeatable and minimally faster. The entry section of the turn that later brake line puts you on also gets pretty greasy on hotter days here.
If I am slowed down 5 feet before I would want to be, I will trail brake, turn in early and put my right tires on top of the curbing, it cuts distance and isn't slower.
From the apex of T1, I maintain and the same steering input as I apply throttle (at the point my tire is on the curb) all the way through the turn and slowly unwind at the end.
Done correctly, with an early turn in, means never going much past mid-track on this turn complex and, on exit, ending up perfectly aligned on the right side of the track with tires pointed down the short section of straight track before the track bends left.
Left Bend (my write-up, my naming convention...)
This is the little left jog before the significant and fast T3. This turn where you can tell when a driver is working, lazy drivers will be coasting here.
Exiting T2 at track right you go through this left bend at the end of which you will need to straighten, brake, and turn left again.
The goal here is to prepare as well as possible for T3, this means having the car exit the bend pointing as left as possible or with as little diagonal angle crossing the track in the T3 brake zone as possible, this while keeping the throttle flat all the way from T1 apex.
In a lower-powered car, this means you can "apex" this turn about a car width from the curbing and line up nicely to brake for T3 close to track right. In a fast car like the Production V8 M3, you will have to straighten things out, apex right next to the curb (don't unsettle the car by hitting the curb significantly) and probably still lift a tick - otherwise the T3 entry will be too sloppy.

T3 - AKA "Nascar"
A decreasing radius turn, named for the numerous Nascar drivers who seemed to have trouble with the concept and went flying off-track at the exit.
Out of the left bend, you need to very quickly find a short, almost straight section to apply some significant braking (and maybe a downshift), then trail off the brakes smoothly with a slightly early turn-in and your eyes looking to the exit.
I like to leave a couple of feet of asphalt on the right side at entry as room for error. Using all the track doesn't seem to help speed and usually only serves to trick me into turning in too late and with the amount of trail braking I like to use to carry the speed I want to through this turn, the rear can get a little wiggly sometimes and I prefer to slip onto pavement rather than losing it onto grass!
If, as I am turning in and looking through the exit, I realize I am too early, no big deal, I keep the steering input, go over the curb and cut more distance off the track. But if you aren't looking through the turn and toward the exit as you turn in, you will be too early and go flying off.
T4
This seems to be a sucker's turn entry. I like late braking but you do not make up time by braking late into this turn. Brake earlier than you would think, it is critical for your lap time that you exit this turn with the car in shape and with the throttle down not blowing by the apex still trying to gather it up post-apex.
Work up to pushing it, don't approach this turn by late braking or you will have a frustrating event.
You want to apex on the shoulder (the angled part) of the curb and at the exit place the car no more than 1 and half or 2 feet off the left side of the track.
As you apex and quickly unwind the steering wheel, you will be applying the throttle you will hold almost to the top of the uphill esses. Starting this section "straight", on the power sooner, you increase your speed through a very long section.
If I find myself entering T4 with too much speed, I will turn in a little early, go more aggressively over the top of the curb, and use it to rotate the car the rest of the way.
T5/5a/6
Exiting T4 flat on the throttle you need to manage the car's right to left weight transfer as you turn right into T5, smoothly but deliberately.
I track out next to the curb of T5 before continuing into the next right T5a, but I prefer to stay off the top due to the variable grip there - next to it is usually good for me.
T5a is the right hand entry into the Lower Esses or "the Snake" and is entered holding a constant radius on the steering wheel from T5. You really need to keep your eyes up and down track here to go fast and be safe, tire walls aren't all that far away here, especially in the rain!
In a slower car with good tires, T5a is easy to take flat but some cars will require a lift of the throttle to get enough front grip to make the turn without pushing. Remember, if you have to lift, a little proactive lift is way better than a massive lift when you are running off track because you didn't act soon enough. That big lift will haunt your straight line speed for a long section to come.
Qualifying, in the heat of battle or otherwise trying for a fast lap I will, rather than lift, turn in a little more a little earlier to get the car pointed to the right a little sooner (which will put your right tires over the dirt at the top of the curb) and let the car push while staying in the throttle (Ed.note: Axis motto "turn in early with big speed"). You can't do this lap after lap, but you can get away with a couple.
For setup, this push is built into the track so if you are in a car that is on the limits here, just deal with it instead of changing the car and sacrificing other areas.
I often find myself shifting somewhere around T5a. If I am in a long race and lifting to get front grip, I short-shift (gearing dependent, but it is usually the case) at the same time I am lifting to make front grip, no reason to pause power application a second time.
When I am going all out and shoving the car through without lifting, my shift will come right as the car is unsettled from hopping 5a and transitioning into the left-hand portion. Timing on this is tricky, you really have to be focused on guiding the car down the track instead of micromanaging the weight movement, but the car is unsettled and not totally capable of accepting full power so it is the perfect opportunity to sneak in an upshift.
As soon as you apex the right-hand T5a, you are looking through the left-right-left behind it and making as straight of a line as possible through then - these are not three more turns that you need to wind around. T5a was the tough part - now you focus on conserving momentum and rolling as much speed as you can down the straight. Always use all the track-out you need in the last left hand kink and stay on the right side of the track, don't meander...
Uphill Esses
In a slower car, or one with good downforce (defined as any car where you don't scare yourself while maintaining full throttle to the top of this section), the goal is to be as smooth as possible in the transitions that wind up this hill to keep the car rolling forward, sliding unnecessarily scrubs speed and slows forward momentum.
For faster cars, you will start speeding up the inputs, adding a little drift here and there (whole car sideways slip not Ken Block, tail-out drifting) and adding curbs to help reach the same end goal: full throttle all the way up.
In this section more than any other, consider the rise and fall of the track and use the compression it gives you to quickly position the car. When it falls away and grip lessens, make sure you are pointed down-track with momentum carrying you that direction. Like in the Lower Esses, look way down track and don't micromanage, guide the car in a general direction and deal with what you have at the moment instead of correcting mistakes made 10 feet ago. This is a section of linked turns you need to stay on top of. If you get behind on the rhythm, cut some curb or lift if you have to to get back on track.
Entering this section, I cheat and sneak another 8-12 inches of pavement on the right side by easing over into the North Course connector before turning left into the Uphill Esses. I enter the T7 left of the Esses keeping the car next to the left curbing on "exit". Then right into T8 gently and, as the track rises, add more steering input to take advantage of the grip and end up mostly straight and pointed at the next left-hand apex as I prepare to crest the hill.
In a fast car where the track radii have to be increased to carry the potential speed (sedan car), I take an aggressive line over this right hand T8 apex curb. Take a little and it will be rough, but if you go big, the leading edge of the curb will launch you and the trailing edge on the far side of the turn will catch you like a big pillowy landing ramp - just make sure the car isn't terribly crossed up when it enters this piece as the left side wall isn’t overly far away.
The track is again falling as you enter the un-named left-hander but we are already pointed at the apex anyway. Right at the apex, the track goes from falling to rising so I quickly crank left steering to bend around the curb and then transition right for the final turn in this section.
Going through the last right, T9, I will keep the car about 1/3 off the right of the track at "exit" and certainly no-more than mid-track, if I have to lift, I do it.
Passing into and through the Uphill Esses is 98% of the time a bad idea. With two aware and capable drivers it can work and be spectacular but really judge that other car and let discretion win that argument. It does no good to decide not to pass, then ride a car's tail all the way through this section - if you see that you aren't going to get it done before the T7 section entry, set your car's gap appropriately and early, then focus on maximizing speed and closing that gap on the way up the hill, culminating in a slingshot pass right past the T9 apex and into South Bend - this is my favorite place to pass on this track.

South Bend
This turn is fast and requires commitment and trust the track is going to be the same place it was last time around!
I usually downshift before this turn and, depending on the car's speed, I am not always track right at entry or as fully gathered up as I would want to be.
If not in a slow enough car to have that perfect entry, I brake somewhat on a diagonal toward the apex. Braking is done very smoothly with a brush of the pedal. I may be getting rid of more sped than "brush" would imply but I am doing it smoothly and focusing on balancing weight transfer.
Usually I apex on the shoulder of the curb and again, if I find myself early and go over the top here, no worries. Stay the course, eyes down the road and let the car track out up to the edge of the curbing (and on top if needed but I do not make it part of my standard line - a little room for error is good here).
If you do go wide right on exit, let the car go instead of pinching it to stay on track (the left wall beckons here…), but quickly identify the drain inlet that will rip the bottom of your car off about 10’ away from the right edge of the track at the bottom of the dip and position to avoid.

T11 - Oak Tree
There is a fast right-hand bend before Oak Tree. As I exit South Bend, I take an almost straight, diagonal crossing line toward the left side of the track to the start of the brake point for the T11 right. Again, there is no point in winding down the road and creating more turns than needed - cut distance! I give the car a quick right steering input while braking and end up on the left on exit. The goal here is a smooth transition off brakes so that you can roll good speed through this corner - if you are able to get back on the throttle with any authority before Oak Tree, you have slowed the car too much in braking and need to slow less, roll more. I do use just a tick of throttle to settle the car before braking into Oak Tree.
Oak Tree is a tight turn and right onto the longest true straight. I usually avoid the temptation to downshift to a high gear that will run out immediately and instead turn in a little earlier (not an early apex - an early turn in) and get the car pointed down-track and focus on being full throttle before the apex curb. Track out should put you on the shoulder or top of the exit curb consistently.
Passing in the section between these two right hand turns is very inviting, but seldom rewarding. The focus of Oak Tree is exit speed - going to the inside of the track to then have to square off that turn is a total waste of effort and typically risky and semi-blind because no one expects it. Sometimes that is a good thing, but not here.
Back Straight
Its a straight - drive full-throttle, right? A little more to it than that here.
This straight isn't so straight - that doesn't mean you need to keep it smack in the middle of the track. Exit Oak Tree, look all the way to the end of the straight and make a straight line. Don't meander! Don't add distance! Typically, you will shift 2-3 times on this stretch and while the track is going mostly straight, it is also rising and flattening out. Feel free to short-shift so that you aren't shifting gears and not under power at the steepest points of the hills.

T14
The track is coming up to meet you, get ready to brake but wait for it. You want to brake one time as you reach the end of the back straight, go through the left-hand T14 and then continue to scrub speed to enter the right Roller Coaster.
Your foot should never leave the brake pedal in this section: brake hard, ease pressure as you roll speed into and through the turn, and increase pressure as you straighten the car out again to finish braking. If you accelerate, after turning left, you slowed too much.
Ideally, at the exit of this turn, I am close to track left and parallel or close to it but, especially in race conditions, I will push a little deeper on the brakes which won't fully allow you to straighten out the car. Do this and you will end up more diagonal in your final braking zone, pointed slightly toward the apex of Roller Coaster.
Roller Coaster
If I enter this one by braking super deep into T14 and slightly diagonal on entry, then I will release that left-hand turn early and turn right into Roller Coaster early and, worst case, I apex on top of the curb instead of beside it.
In these situations, I far prefer to be too aggressive with early turn-in and have my range of outcomes be right next to the curb where I want to be over fighting to make that apex because I was too late and then ending on the power too late.
Look ahead - at apex or before you should be looking down the hill, applying power and be at full throttle down the hill.
T15
Easy turn here. T15 is another one to consider elevation - falling then flattening, which adds compression. Crank in the steering as compression is added. Don't coast - full throttle. Track out to the right exiting T15, but leave about a foot of asphalt for a safety net.
T16
There are a variety of ways to approach this. I have done the range from the school line of "brake before the T16 turn in and not again until T1" to the hairy "full throttle all the way through T16, stab the brakes at the transition to the right for T17 to scrub speed and settle the car, and go".
I think there is a balance in the middle of the two.
The goal of the section is a good entry into T17 at maximum speed which will allow you to get to full throttle as early as possible , a combination bringing maximum straight-line speed on the front straight. To manage speed, I brush the brakes lightly entering T16, just nudge the curb so I am not having to catch a car in a critical part of the track, then another light brush of the brakes right at the straight point as I transition from left to right into T17, this settles the car so it enters T17 more smoothly.
T17
Turn in early, hit the shoulder of the curb and apply power before the car wants it, The hill will flatten out, the car will compress and the car will grab and go.
Of course you want it to "go" in the right direction! You need to have set the car's attitude to point in the right way in the transition point , if you are slipping sideways at the apex it's too late.
I don't track all the way out of the first segment of this turn - mid-track or a little more is fine. I also don't fight to get back to the second right apex here.
Look down the track, watch the final track-out and beyond and let the car do what it wants as long as it is rolling, not scrubbing and headed toward the right final direction. I do track out all the way, then without pinching the car, immediately head for the tight apex touching grass on the Start/Finish tower. No need to add distance by making a big sweeping arc here.

CAR SETUP
For VIR, the focus is on high-speed handling. There are a few tighter turns but the time is really made in the fast parts.
Many of the fast sections are started with fast side-to-side transitions meaning you will need to have a higher amount of spring and bar in the car to make it responsive and get it to be agile instead of wallowy.
There are two very high-speed straights but just as critical is the T4-T11 section, super fast and winding through the hills. You need aero downforce if you have it but not so much that you turn the car into a brick on the straight.
With two primary braking zones that in our Production V8 car are 165 to 50 mph and two lesser, but not undemanding other ones, make sure you have good pads and plenty of material on them.
VIDEO CAR INFO
The car I am driving in the first video is the BimmerWorld / Red Line Oils BMW E92 M3 “Production V8” project car. It is our ex-GRAND-AM GS car on steroids.
In this video, it has a very moderate 400 wheel horse from a stock test motor, turning through a 6-speed Drenth sequential gearbox, put to the ground with Hoosier R100 slicks.
Performance Friction brakes on 4 corners slow it down, Motion Control 3-Way dampers and a compliment of BimmerWorld aero components stick it in the turns and Red Line occupies all the fluid reservoirs to keep it reliable under pressure.
In GS trim and in a GS field, this was a high 2:03 car at VIR Full, as it runs in the video is a 1:57 car headed to drop below the 1:50 mark by the end of the development project.
I have driven a wide range of marques and models at this track and many share similar characteristics - "can I keep it flat in the uphill esses?", "how late can I brake off the back straight?", etc, and from a SpecE30, to this V8 monster, VIR is always a challenge.
CLOSING
VIR is the closest track to BimmerWorld HQ in Southwest Virginia, if it were not in my backyard, it would definitively be worth the pilgrimage from across the country or even across the pond!
I have raced here in both World Challenge and GRAND-AM, run club races, time trials and our team has won the 13 Hour enduro four times so far. It is a racers' track in all senses.
My favorite on-track moment of every year is at our local BMW club's Track Day, on the Sunday afternoon when most people have left and the track is empty, the sun is setting early and the ground has gotten cooler (but not too cold yet) so the grip is unparalleled. At this time, in this closing session of the official "track season", the lap times click faster and faster because the track is inspiring you to dig deep and lay it all out. It is incredibly serene and rewarding and the connection between car, driver and nature, with a catalyst of pure speed, is almost unreal.
Axis of Oversteer, How to drive FASTER brings you detailed track guides and advice from professional drivers aimed at the advanced driver, time trailer and club racers. You can find otherepisodes HERE
Excellent write up James! Thanks for all your good input at UTCC.
ReplyDeleteFantastic write-up. Thank you, James!
ReplyDeleteGoing to VIR for the first time in two weeks. Will take a printed copy of this with me. Thanks.
ReplyDeletei really liked your commentary about vir. i was just there this past weekend as an instructor. while i really like the fact that you are passing on great info , i sort of hate it also because it will make it harder to pass people in the races. thanks though for the input.
ReplyDelete